Native CSS Nesting
Summary: A dive into what nesting is, some of the gotcha’s with it, a little bit of how it differs from Sass nesting, and more.

Native CSS nesting is here, and it’s pretty awesome.
A nice example of where nesting can be useful is when you have a navigation, where using descendent selectors can be pretty useful!
.primary-navigation {
	padding: 1rem;
}

.primary-navigation ul {
    display: flex;
    gap: 1rem;
    list-style: none;
		margin: 0;
		padding: 0;
	}
}

.primary-navigation a {
		text-transform: uppercase;
		text-decoration: none;
  }
}
With nesting, we can do this instead:
.primary-navigation {
	padding: 1rem;

  & ul {
    display: flex;
    gap: 1rem;
    list-style: none;
		margin: 0;
		padding: 0;
	}

  & a {
		text-transform: uppercase;
		text-decoration: none;
  }
}
This might look familiar if you’ve used nesting with Sass or Less, but there are some really big differences and gotchas with CSS nesting.
First, let’s start with the very basics of it
What is nesting?
Nesting in CSS is when you write a CSS rule within another CSS rule, as we saw above where we have & ul { ... } nested inside of the .primary-navigation rule.
When we do this, it’s basically the equivalent as writing out the full descendent selector, such as .primary-navigation ul in that example above.
This can be really useful for creating descendant selectors without repeating the first selector each time.
The ampersand
The & is a new selector, called the nesting selector, which has been added as part of the nesting spec.
Another example of a symbol that is a selector is the *, which is our universal selector, and now we have &, which is our nesting selector.
We also have a lot of other symbols in CSS, such as ., which is for class selectors, # for IDs, so this idea of using a symbol to represent something is nothing new.
In this case, the & represents the element, or elements, matched by the parent rule.
And that’s why the nested ul acts like .primary-navigation ul.
Unlike nesting with a pre-processor, the & is not compiling anything and making it into a string, which we can see that by looking in the dev tools.
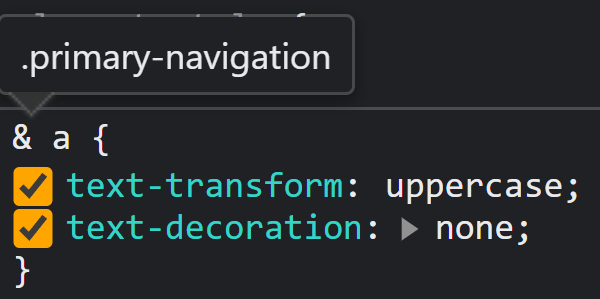
In a pre-processor like Sass, this would actually be turned into nav ul… with native CSS nesting, it’s a live object instead.
This is similar to the differences between pre-processor variables and native CSS custom properties, where there are a lot of similarities, but some very important differences in how they work as well.
Why we need the &
In a pre-processor, the & can be useful, but for simple nesting like in the example below, I don’t need to bother with it.
/* this is valid SCSS, but is NOT valid CSS */
footer {
 a { color: black; }
}
In CSS, this example is invalid and wouldn’t work.
This is because in native CSS if you want to nest a selector, it must start with one of these symbols.
& @ : . > ~ + # [ *That might seem like a strange list of symbols, but they’re all the symbols we can use to make a selector, or as part of a selector.
This leads to what can feel like a strange rule with nesting: when you nest element selectors, you need an &, but when you nest any other selector, you don’t.
Instead of thinking about it that way, I prefer thinking about it like this: a nested rule must start with a symbol.
So either the nested selector symbol or any of those other ones, like a class symbol ., an ID symbol #, a descendant combinator >, etc.
You can also use the ampersand everywhere if you want, and it won’t cause any harm.
For example, these two would be the same thing:
.nav {
  .nav-link { color: black; }
}

.nav {
  & .nav-link { color: black; }
}
I don’t need to bother with the & because .nav-link starts with a symbol, but including it doesn’t change how this would work, they are equivalent to one another.
If you want to include the & everywhere for consistency, you certainly can, though I don’t think many people will go that route.
You can’t make prefixed selectors with &
One of the biggest benefits of using & in Sass is creating selectors where the parent selector acts as a prefix, like this:
.nav {
  &__list { ... }
  /* compiles to .nav__list */

  &__link { ... }
  /* compiles to .nav__link */
}

.btn {
  &--primary { ... }
  /* compiles to .btn--primary */

  &--accent{ ... }
  /* compiles to .btn--accent*/
}
This works in pre-processors which concatenates everything since it’s all just strings at the end of the day.
Because the nested selector is a live object and doesn’t get compiled, in CSS nesting, this doesn’t work.
It might seem a bit strange if you are used to using a pre-processor, but CSS treats the --accent as its own selector.
Just like we can have .btn.accent and .accent.btn. Both of these selectors are effectively the same thing.
Similarly, using & as I did in the example above would basically be the same as --accent.btn, which clearly isn’t what you want.
The & is a live object that is always treated as it’s own selector.
This can feel like a disadvantage to native CSS nesting compared to the pre-processors, but there are times where using the & can be useful.
Creating compound selectors with &
If I want to use nesting to create a compound selector, we need the use & or else we could run into creating descendant selectors instead.
For exmaple, this probably isn’t what you want.
.button {
  padding: .5em 1em;
  border-radius: .25em;
  border: 0;

  .accent {
     background: hotpink;
  }
}

/* equivalent to `.button .accent` */
This would create a selector equivalent to .button .accent, so it’s looking for a .accent class inside of my .button.
Instead, we can do this:
.button {
  padding: .5em 1em;
  border-radius: .25em;
  border: 0;

  &.accent {
     background: hotpink;
  }
}
This would create a .button.accent selector.
One of the most common things I’ll do is use this for hover and focus states:
a {
  color: orangered;

  &:hover,
  &:focus {
    color: hotpink;
  }

}
Or if we want an underline on all of our list items, except the last one:
.nav {
  & li {
    border-bottom: 1px solid #efefef;

    &:not(:last-child) {
      border: none;
    }
  }
}
Placing the & after another selector
Another interesting thing you can do with the ampersand is also create a reverse descendant selector:
.card {
  background: #efefef;
  color: #333;
  & h2 { color: #111; }

  .dark-theme & {
    background: #222;
    color: #ededed;

    & h2 { color: #ddd; }
  }
}

/* equivalent to
.card { ... }
.card h2 { ... }

.dark-theme .card { ... }
.dark-theme .card h2 { ... }
*/
This can be a little hard from a readability point of view, but it’s cool that you can style an element based on where it is nested in the HTML, all within the original rule.
Nesting @ rules
This is my favorite part of nesting.
Being able to nest @ rules means we can do this!
.card {
  font-size: 1rem;

  @media (min-width: 780px) {
    font-size: 1.125rem;
  }
}
We can also use nesting for things like @layers , @scope, and @container for container queries as well.
I love, love, love, not having to leave the original selector, create a media query, and then have to create a new selector again inside the media query.
It might seem like a silly little quality of life thing—and it very much is—but it’s such a good one and I’m so happy this is part of regular CSS now.
Specificity with nested rules
One thing you might have noticed is that almost all the rules we’re creating are making descendant selectors, and that might be a no-no for some people, as it influences the specificity of our selectors.
Yes, we want to be careful with specificity, but completely avoiding descendant selectors like these is limiting yourself for no reason at all, and often making life more difficult than it has to be when writing your CSS.
I’ve always seen avoiding descendant selectors at all costs as akin to riding a bike with training wheels on it.
There is a reason that we tell people to stick with single class selectors for everything, but at one point, once you understand what you’re doing, it’s okay to take advantage of one of the core features of CSS.
Now, what you want to avoid is doing something like this:
nav {
  & ul {
		list-style: none;
		display:flex;
		gap: 3rem;

	  & li {
				padding: .5em 1.5em;
				background: #333;

		   & a {
					color: #fff;
					text-decoration: none;
			}
		}
	}
}
In this case, we have redundant nesting that makes things a lot messier.
This hurts readability and raises specificity for no actual benefit.
There’s no harm in nesting one level deep as long as you understand the consequences of doing it, which in this case is slightly raising the specificity.
Nesting uses :is() under the hood
This is where things can potentially get a little trickier, as we’re taking regular descendant selectors and making them slightly more complex by throwing :is() into the mix.
To understand how specificity works with nesting, we need to understand how :is() works, because nesting uses :is() under the hood, where the specificity of :is() is determined by the selector inside of it with the highest specificity.
This is important because these two would be the same:
.navigation, .footer {
  & a { color: black; }
}

:is(.navigation, .footer) a {
  color: black;
}
That doesn’t change much, but something like this would:
#primary-nav, .footer {
  & a { color: black; }
}

:is(#primary-nav, .footer) a {
  color: black;
}
The reason this is important is that :is() uses the specificity of the highest specificity selector within it, so the link in this second example, would have a specificity of 1 0 1 whether it’s in the nav or the footer.
I don’t think this is going to be a big issue, personally, but it is one of those things that could catch you off guard and take way longer to debug than it should 😅.
Changing the order of your CSS
Another thing nesting can do is change the order of the CSS you write!
This is because the browser will group all the directly nested selectors together and put them first.
So, while you probably wouldn’t do this:
p {
  & { color: red; }

  color: blue;
}
The paragraph would be red.
Now, that said, this is handy in a way because all nested media queries will be brought to the bottom, which is generally what you want anyway!
p {
  @media (min-width: 780px) {
    font-size: 1.5rem;
  }

  font-size: 1rem;
}
Because regular style declaration is hoisted to top, the media query will work as intended.
If it wasn’t, the second font-size one would overwrite the media query and it wouldn’t work.
This does mean that the order we write things in isn’t always going to be the same order that the browser sees things in, though, and that’s something to watch out for.
Nestings impact on readability and searchability
One common complaint with nesting is it hurts readability since you have to interpret the nested selectors instead of seeing exactly what they are.
Another complaint is that it hurts searchability, as you might see a selector in your dev tools, but because of how a pre-processor has compiled things, you can’t directly search that in the codebase.
Because we can’t concatenate with native CSS nesting, I personally feel like the readability issue doesn’t hold true, and of course, now the selectors are the same everywhere now, where we can even see the & in the final code and in the dev tools.
Of course, some people will still complain about not using descendant selectors as well, but we already talked about how I don’t think that’s an issue…
Browser support
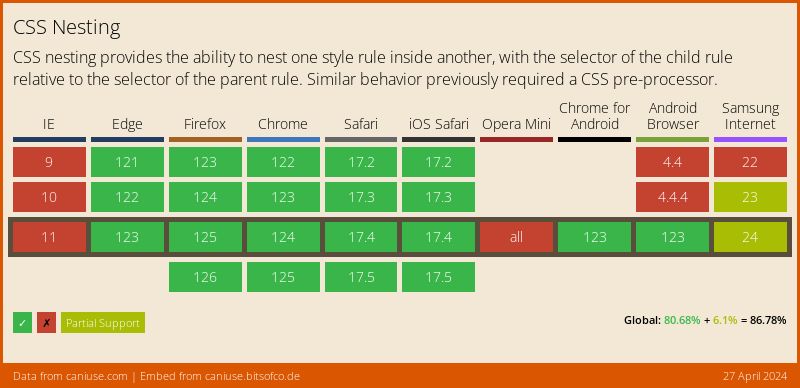
And onto the elephant in the room, browser support!
If you’re reading this in the future, support might be really good already, but as of the time of writing, it’s not perfect… though it’s probably better than you expected, at almost 73%!
This is one of those things that will break a site if it doesn’t work, so we do want to be careful with using it in production, and in many ways it’s a bit of syntactic sugar that can make devs lives easier, so for now you you might want to stick to using Sass or another pre-processor until support gets better…